MapBox iOS SDK - Adding the RMImageAnnotation class
By Mike Gledhill
The RMImageAnnotation class
The RMImageAnnotation class lets you draw an image on a MapBox map, when you're using the MapBox iOS SDK.
It's very easy to use, simply specify the top-left and bottom-right cordinates of where you want the image to appear on the map, and MapBox does the rest.
// Paste an image on our map
CLLocationCoordinate2D topLeft = CLLocationCoordinate2DMake(57.5998, -18.2516);
CLLocationCoordinate2D bottomRight = CLLocationCoordinate2DMake(37.3908 , 21.8582);
UIImage* img = [UIImage imageNamed:@"SomeImageToDisplay.png"];
if (img == nil)
{
NSLog(@"Couldn't load the image");
return;
}
RMImageAnnotation* imageAnnotation =[[RMImageAnnotation alloc] initWithMapView:mapView topLeft:topLeft bottomRight:bottomRight image:img];
[mapView addAnnotation:imageAnnotation];
I haven't checked this code into GitHub, for no other reason than this code works for me, but perhaps this isn't the most efficient/tidiest way of adding images to MapBox.
But, feel free to add this code to your app.
And, I'll say it again, remember that this is for the "native iOS" version of MapBox.
These changes aren't for the HTML (web) version of MapBox.
1. Download and install the MapBox iOS SDK
You can download the MapBox iOS SDK, along with an example XCode project, from the MapBox website:
https://github.com/mapbox/mapbox-ios-example
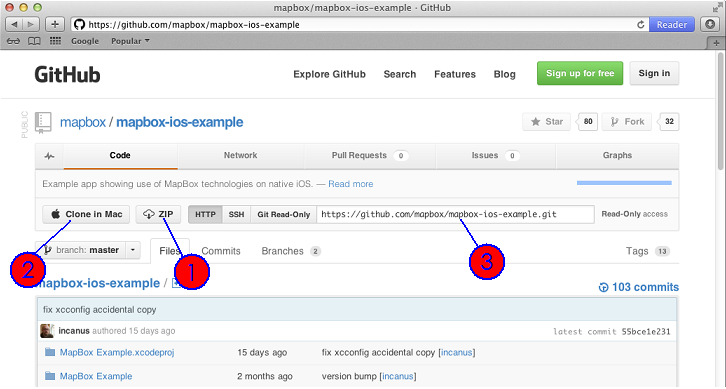
Three quick things to say about this:
| 1. |
There is a friendly "zip" button (shown with a number "1" above) to download the source code as a zip file. Don't do this. You'll end up with a fraction of the code you'll need, to have a working project. |
| 2. |
Alternatively, you can install GitHub on your Mac, then click on button "2" above, to download a copy of the source code. Don't do this either ! Perhaps it's just me, but I also found that this method didn't get all of the code needed to get the full working demo. Stick to the instructions shown on the MapBox, pretend it's the 1980s, and download the source code via the command line using the git command: 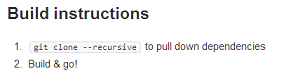 |
| 3. |
I'm sure it's just my bad luck, but wherever you store the XCode files on your Mac, make sure that the folder name doesn't have any spaces anywhere in it's name. Stupidly, I had all of my XCode projects stored under a folder called XCode 4 Projects. XCode didn't tell me that spaces weren't allowed in the folder names, but those two spaces caused all kinds of errors & issues when I was getting this to work, particularly when I tried to add the MapBox-iOS-SDK project into a different XCode project. Changing my folder name to XCode_4_Projects fixed these problems. |
Right then, so I assume you've got the MapBox demo app building successfully on your Mac.
Let's add the new class.
2. Add the RMImageAnnotation files
First, you need to add the following two files into the MapBox-iOS-SDK\MapView\Map folder.
This class inherits from the RMShapeAnnotation class, and simply adds a UIImage property to it.
RMImageAnnotation.zip
3. Adapt the RMShapeAnnotation class
In the ShapeAnnotation.h file, add the following functiob declaration:
-(void)setImage:(UIImage *)image;
Then, in the ShapeAnnotation.m file
-(void)setImage:(UIImage *)image
{
[super setImage:image];
}
4. Adapt the RMAnnotation class
Next, we need to add a UIImage to the underlying RMAnnotation class.
In the RMAnnotation.h file, add the following line:
@property (nonatomic, strong) UIImage* image;
In the RMAnnotation.m file, add the following line at the top of the file:
@synthesize image;
..then add the following lines to the setLayer function:
- (void)setLayer:(RMMapLayer *)aLayer
{
CALayer *superLayer = [layer superlayer];
if (layer != aLayer)
{
if (layer.superlayer)
[layer removeFromSuperlayer];
layer = nil;
}
if (aLayer)
{
layer = aLayer;
layer.annotation = self;
if (self.image != nil) {
layer.contents = (id)self.image.CGImage;
layer.opacity = 1.0f;
layer.bounds =CGRectMake(0, 0, self.image.size.width, self.image.size.height);
layer.frame = CGRectMake(0, 0, self.image.size.width, self.image.size.height);
}
[superLayer addSublayer:layer];
[layer setPosition:self.position animated:NO];
}
}
5. Build the project
We're not actually finished yet, but have done enough for you to see your image displayed on the MapBox map.
Build the project, and check that your image does get displayed, and that as you zoom in and out of the map, it repositions itself as expected.
But now, see what happens if you really zoom in close. You'll notice that your image starts "hopping around" the map.
6. Tweak
To fix the "hopping around" issue when you zoom in "too far" on the MapBox map, you need to make a slight change to the RMShape.m file in the MapView\Map folder. Find the following line, and change the value of the outset variable from
const float outset = 150.0f; // provides a buffer off screen edges for when path is scaled or moved
..to a much larger number..
const float outset = 130000.0f; // provides a buffer off screen edges for when path is scaled or moved
(This is another reason why I haven't posted this code on GitHub. I'm not quite sure of the consequences of changing this value.)
And that's it.
You can now display images on your iOS MapBox maps, at a particular location.
Comments