WCF Web Services & iOS - Part 1
By Mike Gledhill
In this section, we're going to go through the steps required to make a WCF Web Service in Visual
Studio 2012.
As you'll see, it's quite straight forward if you get all the steps right.
Personally, I found it hard to find one up-to-date resource which would take me through these steps.
Our ultimate goal is to send data from a SQL Server database to an iOS device.
We will create a WCF Web Service to read in data
from the SQL Server database, and return it in a generic, non-Microsoft (JSON) format, which the iOS device will be able to
understand.
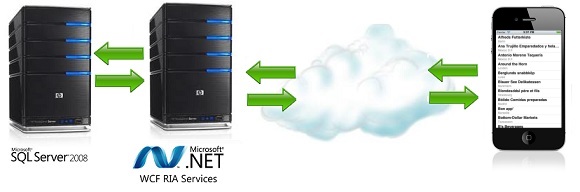
This section deals with setting up and testing a very basic WCF Web Service, which returns JSON data, and is ready for us to link to the Northwind SQL Server database in the next section.
To follow this tutorial, you will need the following:
- A copy of Microsoft Visual Studio 2012 or 2013
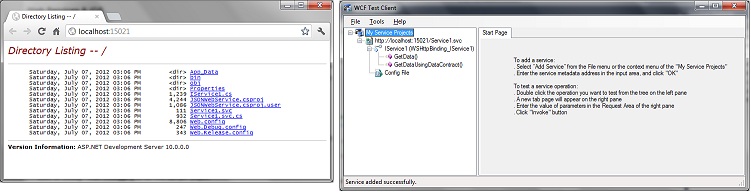
Creating the WCF Web Service
GetData) and our numeric value (e.g. 13) within the URL:
GetData's parameter type from "int" to "string"
public string GetData(string value)
{
return string.Format("You entered: {0}", value);
}
[OperationContract]
string GetData(int value);
[OperationContract]
[WebInvoke(Method = "GET", ResponseFormat = WebMessageFormat.Json, BodyStyle = WebMessageBodyStyle.Wrapped, UriTemplate = "getData/{value}")]
string GetData(string value);
Let's just take a quick look at the new WebInvoke line we've just added.
ResponseFormat attribute tells WCF that we want our service to return a JSON string. If you were to
miss out this ResponseFormat setting, the web service would still work, but it would return your value in XML format instead:
<GetDataResponse xmlns="http://tempuri.org/">
<GetDataResult>You entered: 13</GetDataResult>
</GetDataResponse>
UriTemplate attribute, to specify that we will always be passing a parameter when we call this URL.
So, we've set the UriTemplate as this..UriTemplate = "getData/{value}"
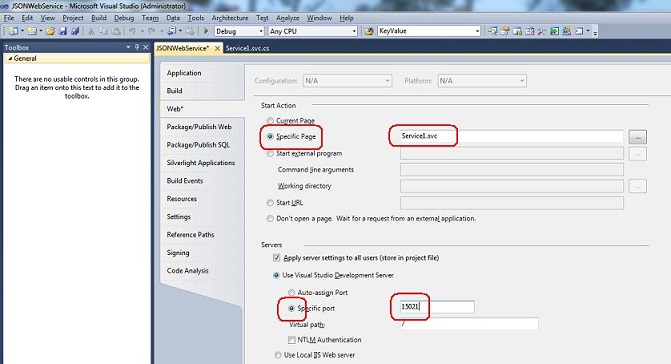
http://localhost:15021/Service1.svc/GetData/13
Now, open up the web.config file, and add the following <endpointBehaviors> tag, just after the <serviceBehaviors> tag.
<behaviors>
<serviceBehaviors>
<behavior name="JSONWebService.Service1Behavior">
<!-- To avoid disclosing metadata information, set the value below to false and remove the metadata endpoint above before deployment -->
<serviceMetadata httpGetEnabled="true"/>
<!-- To receive exception details in faults for debugging purposes, set the value below to true. Set to false before deployment to avoid disclosing exception information -->
<serviceDebug includeExceptionDetailInFaults="false"/>
</behavior>
</serviceBehaviors>
<endpointBehaviors>
<behavior name="webBehaviour">
<webHttp/>
</behavior>
</endpointBehaviors>
</behaviors>
<system.serviceModel>
<services>
<service name="JSONWebService.Service1" behaviorConfiguration="JSONWebService.Service1Behavior">
<endpoint address="../Service1.svc"
binding="webHttpBinding"
contract="JSONWebService.IService1"
behaviorConfiguration="webBehaviour" />
</service>
</services>
...etc...
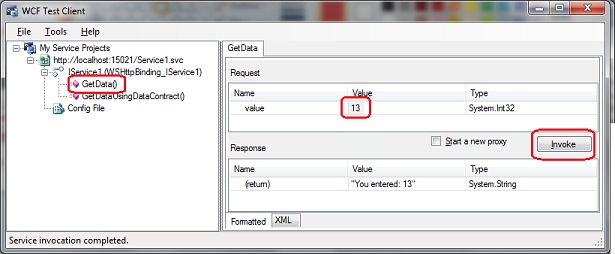
Let's run the project again.
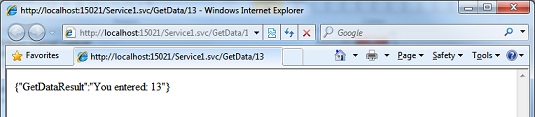
http://localhost:15021/Service1.svc/GetData/13
http://localhost:15021/Service1.svc/GetData/SomeNumberorOther
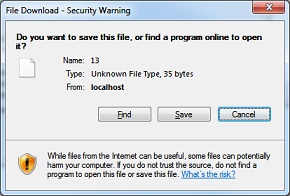
Thankfully, there's a simple solution to this.
Summary
We haven't actually started writing our Northwind web services yet, but at least the pieces are in place for us to begin. (And what you don't realise is that it took me hours of experimenting and Googling to get this far myself !)
{"GetDataResult":"You entered: 13"}
You entered: 13
Disclaimer
Comments